| HOME | USEFUL TOOLS | HINTS & TIPS | GALLERY | CONTACT ME |
MENU
|

Gun Deck Planking |
 Gundeck |
|---|
Please hover mouse on thumbnail for a bigger picture
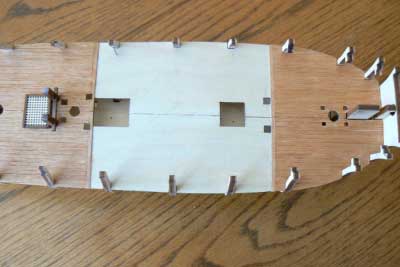
The instructions say to cut the deck through the middle to aid fitting, this will be hidden by the upper decks and is the easiest way to do things. I first drew a line down the centre to aid with planking (0.5x3mm Tanganyika) then cut along the length. If any adjustments need to be done only trim the deck edges and slots NOT the centre line you will cut. Pin and glue the deck once planked. When dry and before the beams are fitted sand and varnish the deck. Make sure you fit he hatch combings, capstan, rear main mast bitts and main pump cistern and cannon carriage.Now glue the fore deck beam in place, cut and pin only! the fore and aft decks.
Make sure the deck is correctly trimmed to fit the bulkheads ready to take the pre-formed gun-port strips. The front of these will require allot of soaking (a good hour)to make them pliable. Once they are seated correctly(take your time with this!) glue and pin them.
Once completely cured, remove the pins, and trim any excess to the same shape as the stern counter patterns.
Please see Hints and Tips for deck planking.
NOTE:
- When I glued the gun-port strips in place I clamped the midships sections instead of gluing as the bulkhead extensions will be removed later
- The capstan should be checked to make sure it fits under beam No.9a
- The forward riding bit assembly is best assembled on your bench and then fitted, it will drop into the holes with a snug fit and a little glue.
- Gratings - Make sure you get these the correct way around. The top of the battens are to be seen in their entirety as shown in the instruction manual.