| HOME | USEFUL TOOLS | HINTS & TIPS | GALLERY | CONTACT ME |
MENU
|

Hull - First Planking |
 Gun Port/Bulwark |
 First Planking |
|---|
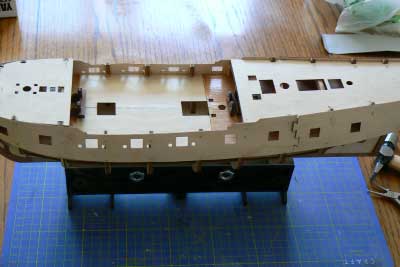
To start dry fit the two upper decks. There are several areas to start the planking but I did as the instruction stated and started at the bottom edge of the gun/bulwark pattern as shown on the plans. Soak all your planks well! I held all planks up to the hull and marked where the pins would go, this enabled me to pre-drill the holes in the planks as this helps stop splitting. Make sure you leave half the pin out so that you can retrieve it later.The first couple of planks follow the hull nicely and don't require much work. Make sure you fix the same amount of planks to each side as this will limit twisting of the hull while the planks are drying. As you work your way down your plank nippers will become a must Make sure the planks follow the natural taper of the ship as this will help stop 'springing'. When you ned to cut a taper try and follow the grain not the edge of the steel rule. Always lay them flat on the cutting mat and use a good blade. Pin and glue the planks leaving a little overhang at the stern ready to trim to shape when they are all dry.
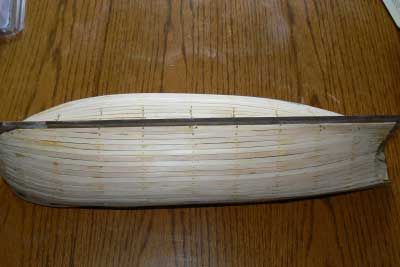
Keep going to the keel, you will have noticed that triangular gaps have accrued (good, you've lay ed the planks correctly).You will now need to make 'stealers', the triangular shaped planks which fit the gap in-between the top and bottom of the planks. Let the hull dry for 48hrs. This is a good time to build and paint deck components.
When finished fit the stern counter fascia and plank up to the lower edge of the stern window fascia using 1x4mm walnut strip.Sand the hull with a course paper followed by a medium grade. This took me about 2hrs to get a good finish ready for the second planking.
Finally follow the plans and instructions for the Main Whale position.